
The Ultimate Guide to Laptop Maintenance: Habits, Hardware Care, and System Optimization for Maximum Longevity
Buying a new laptop—whether it is a high-performance Dell XPS, a gaming rig, or a sleek productivity ultrabook—is a significant investment. Yet, most laptops suffer an early demise not from inevitable hardware failure, but from cumulative neglect. Accumulating dust, poor thermal habits, battery abuse, and software bloat silently degrade performance and slash years off a device’s lifespan.
By establishing proactive maintenance habits, you can keep your laptop running at day-one speeds while extending its physical life expectancy to 5–7+ years. This comprehensive guide covers everything from physical cleaning techniques to battery preservation, thermal management, and operating system hygiene.
1. Daily Operational Habits: Protecting Your Hardware
The way you interact with your laptop on a daily basis determines its baseline mechanical reliability. Small physical stresses accumulate over time, leading to loose hinges, frayed cables, and damaged display panels.
Open the Lid from the Center
Opening a laptop display from the top-left or top-right corner exerts uneven torque across the chassis. Over time, this twists the display panel and weakens one side of the hinge mechanism, eventually causing plastic mountings to snap or the screen bezel to separate.
Best Practice: Always open and close the display lid from the center top edge using even pressure.
Never Use Your Laptop on Soft Surfaces
Laptops intake cool air through vents located on the bottom of the chassis and exhaust heat out the sides or rear hinge. Placing your laptop on a bed, blanket, carpet, or couch cushions smothers the intake vents and traps heat inside the chassis.
The Risk: Internal components like the CPU and GPU quickly hit thermal limits, triggering thermal throttling and accelerating heat-induced degradation of solder joints and capacitors.
Best Practice: Work on hard, flat surfaces like desks or tables. When using a laptop on your lap or bed, place a hard lap desk, tray, or flat wooden board underneath it to preserve airflow.
Enforce a Liquid and Food Perimeter
Liquid spills are the single most destructive event for a laptop. Standard keyboard decks lack waterproof barriers, meaning spilled drinks flow directly onto the motherboard, causing immediate electrical short circuits and rapid corrosion.
Best Practice: Keep liquids at least 12 inches away from your laptop, ideally on a lower surface level than your workspace. Use covered travel mugs or bottles with secure lids when working in mobile environments.
Cable Handling and Strain Relief
Yanking power adapters by the cord strains the internal wire copper and degrades the barrel jack or USB-C port on the laptop motherboard. Loose DC jacks require delicate motherboard soldering to repair.
Best Practice: Always grip power cords by the hardened connector plug when removing them. Avoid wrapping power cables tightly around power bricks; use loose loops to prevent internal cable tearing.
2. Physical Cleaning & Maintenance Guide
Dust, skin oils, and debris create an unsightly appearance and act as an insulating blanket that traps heat inside your machine. Cleaning your laptop requires delicate precision and safe chemicals to avoid stripping screen coatings or damaging components.
The Essential Cleaning Toolkit
Before you begin, gather the right materials. Never use household glass cleaners, paper towels, or harsh solvents.
| Tool | Purpose | What to Avoid |
| Microfiber Cloths | Cleaning screens and chassis surfaces without scratching. | Paper towels, tissue paper, dish towels (leaves scratches). |
| 70% Isopropyl Alcohol | Disinfecting plastics, metals, and keycaps. Safe evaporation rate. | Acetone, ammonia, window cleaner, standard rubbing alcohol (>90% can strip coatings). |
| Compressed Air Can | Blasting dust out of keycaps, ports, and heat exchangers. | Vacuum cleaners (generates static electricity that fries chips). |
| Soft-Bristled Brush | Dislodging stubborn dirt from ports, speaker grills, and hinges. | Wire brushes or hard synthetic bristles. |
                              ┌──────────────────────────────┐
                              │  Power Down & Unplug Laptop  │
                              └──────────────┬───────────────┘
                                             │
                       ┌─────────────────────┴─────────────────────┐
                       ▼                                           ▼
          ┌───────────────────────────┐               ┌───────────────────────────┐
          │     External Cleaning     │               │   Internal Ventilation    │
          ├───────────────────────────┤               ├───────────────────────────┤
          │ • Wipe chassis & screen   │               │ • Short bursts of air     │
          │ • Damp microfiber cloth   │               │ • Hold fan blades firm    │
          │ • Clean ports gently      │               │ • Clear intake grills     │
          └───────────────────────────┘               └───────────────────────────┘
Cleaning the Keyboard & Trackpad
Keyboards harbour microscopic grit that can jam underlying mechanical switches or scratch display glass when the lid is closed.
Power off the laptop completely and disconnect the power supply and all peripherals.
Tilt the laptop upside down at a 45-degree angle over a desk and gently tap the bottom to dislodge loose crumbs.
Use a can of compressed air held upright (to prevent liquid propellant discharge) and spray short bursts across the keyboard rows in a zigzag pattern.
Lightly dampen a microfiber cloth with 70% isopropyl alcohol—it should be damp, not dripping—and gently wipe keycap surfaces and the trackpad area to strip skin oils.
Cleaning the Display Screen
Modern laptop screens (both matte anti-glare coatings and glossy glass) feature anti-reflective or oleophobic chemical layers easily ruined by improper cleaners.
Warning: Never spray liquid directly onto the laptop screen. Liquid can slide down under gravity, seep beneath the lower bezel, and destroy the display backlight controller board.
Lightly wipe dust away using a clean, dry microfiber cloth using zero downward pressure.
For smudges and fingerprints, spray distilled water or dedicated screen cleaner onto a microfiber cloth until slightly damp.
Wipe the screen in gentle, overlapping circular motions starting from the center and working outward toward the bezels.
Dry immediately using a second dry microfiber cloth.
3. Battery Health & Power Management
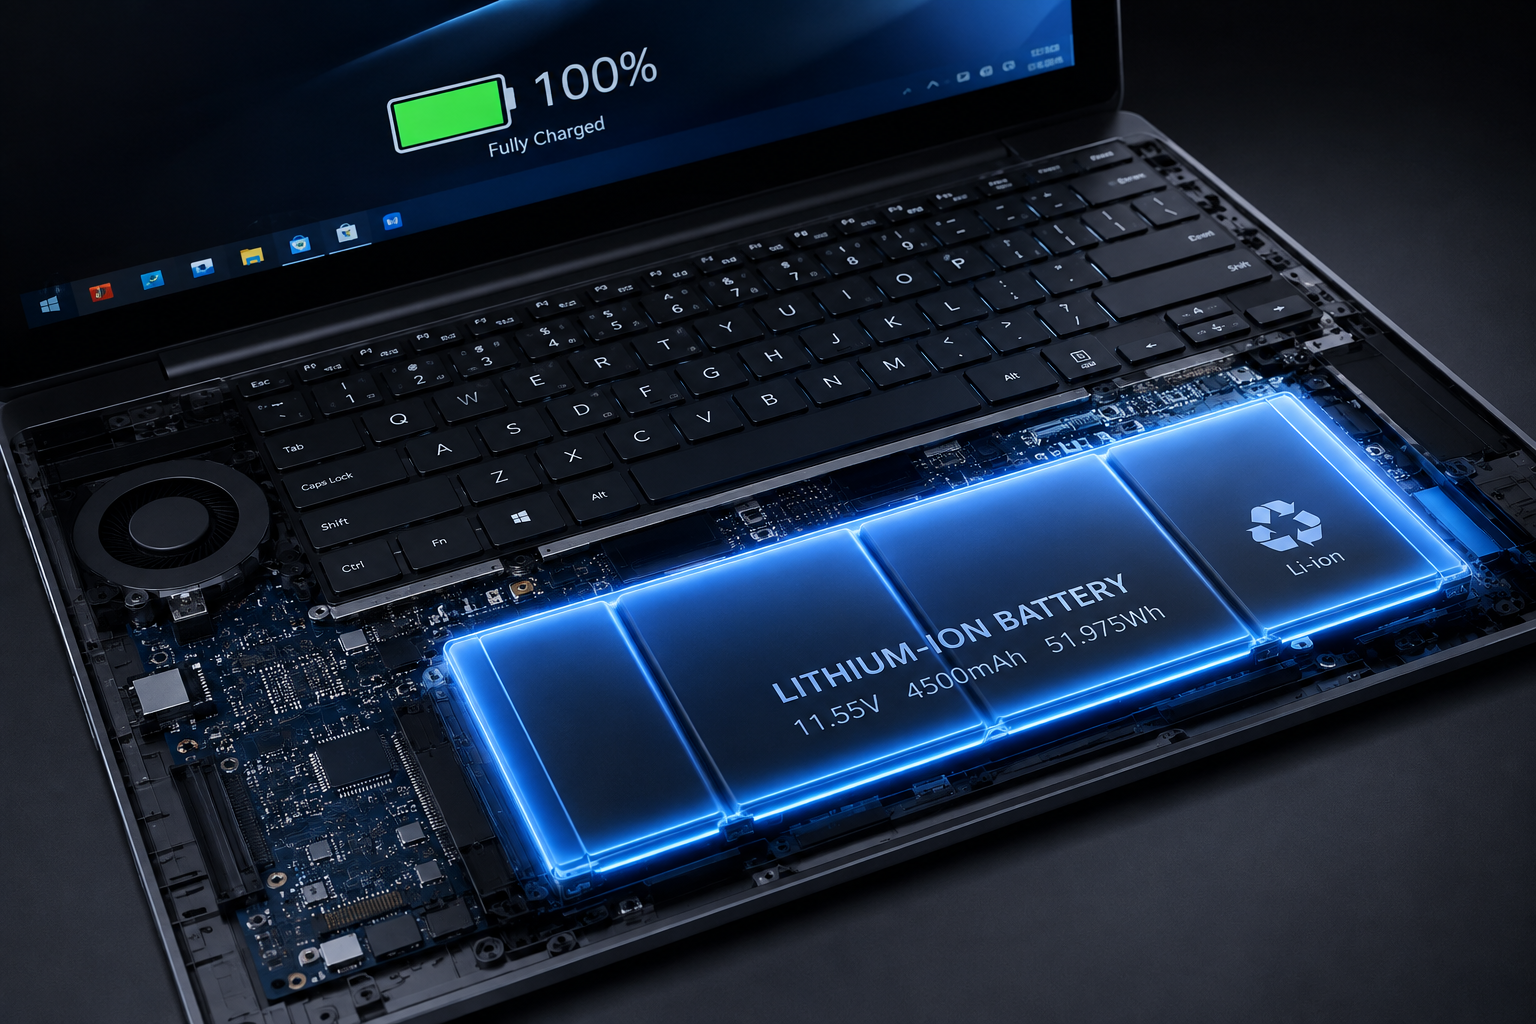
Lithium-ion and lithium-polymer batteries degrade chemically over time. Every charge cycle (using 100% of battery capacity) gradually reduces total energy capacity. However, poor heat management and continuous 100% state-of-charge exposure degrade batteries significantly faster than usage cycles alone.
The 20% – 80% Rule
Lithium batteries experience maximum chemical stress when fully charged (100%) or completely depleted (0%). Maintaining a state of charge between 20% and 80% drastically extends life expectancy—often doubling the total usable charge cycles over a 3-to-5-year period.
Setting Up Smart Charge Limits
Most major manufacturers provide built-in battery management utilities to cap charging thresholds at 80% for laptops perpetually connected to wall power.
Dell Laptops: Open Dell Power Manager (or Dell Command | Power Manager) and select the Primarily AC Use setting, or configure custom thresholds under Custom (e.g., Start charging at 50%, Stop charging at 80%).
ASUS: Use MyASUS → Hardware Settings → Battery Health Charging Mode (set to “Maximum Lifespan Mode” at 60% or 80%).
Lenovo: Open Lenovo Vantage → Device → Power → Enable Conservation Mode (caps charge at 55–60%).
HP: Access BIOS/UEFI on boot and enable Adaptive Battery Optimizer or set charge limits.
Preventing Battery Heat Stress
Charging a battery generates heat. Running heavy processing loads (gaming, video rendering, compiling code) while actively fast-charging causes internal battery temperatures to spike past safe operating limits ($45^\circ\text{C}$). Elevated temperatures accelerate electrolyte breakdown.
Best Practice: When gaming or working on heavy tasks, keep your laptop plugged into AC power with a charge limit already reached (so the battery is bypassed), or let the laptop cool down before charging.
4. Thermal Management: Keeping Components Cool
Heat is the primary cause of premature silicon failure in electronics. Modern CPUs and GPUs dynamically adjust clock speeds based on thermal headroom. When cooling efficiency drops, your laptop slows down to save itself from thermal destruction.
                              ┌──────────────────────────────┐
                              │    Accumulated Internal Dust  │
                              └──────────────┬───────────────┘
                                             │
                                             ▼
                              ┌──────────────────────────────┐
                              │  Restricted Fan Airflow &    │
                              │    Clogged Heatsink Fins     │
                              └──────────────┬───────────────┘
                                             │
                                             ▼
                              ┌──────────────────────────────┐
                              │ Elevated Internal Temperatures│
                              └──────────────┬───────────────┘
                                             │
                                             ▼
                              ┌──────────────────────────────┐
                              │  Automatic Thermal Throttling│
                              │     & Performance Drop       │
                              └──────────────────────────────┘
Unclogging Internal Heat Exchangers
Over 6 to 12 months, intake fans pull ambient dust, lint, and pet hair into the chassis. This material collects on the razor-thin metal fins of the heatsink, blocking exhaust paths.
Locate the air intake grills on the underside of your laptop.
Hold a compressed air can upright about 3 to 4 inches away.
Crucial Rule: Prevent fan spinning when spraying compressed air into vents. Use a plastic toothpick or thin wooden stick inserted through the grill to gently immobilize the fan blades.
Why this matters: Spinning a fan externally with compressed air can turn the fan motor into a generator, sending back-EMF voltage spikes into the motherboard motherboard headers, damaging internal power rails.
Using Passive Elevators vs. Cooling Pads
Simply elevating the rear edge of your laptop by 0.5 to 1 inch increases air intake clearance, immediately reducing internal CPU/GPU temperatures by $3^\circ\text{C}$ to $7^\circ\text{C}$.
Simple Stands / Feet: Highly effective, portable, and quiet. They eliminate airflow restriction beneath the laptop intake vents.
Active Cooling Pads: Useful for high-power gaming or workstation laptops, but ensure the fan layout on the cooling pad aligns directly with the intake vent cutouts on your specific laptop chassis.
Replacing Thermal Interface Material (TIM)
Factory-applied thermal paste between the CPU/GPU die and copper heatpipes dries out over 2 to 4 years, turning into a chalky insulator.
Signs You Need Re-Pasting: Idle CPU temperatures exceeding $60^\circ\text{C}$, fans running at maximum speed constantly, or thermal throttling during basic light tasks.
Action: Disassemble the bottom chassis cover, unbolt the thermal heatsink assembly, clean off the old brittle paste using 90%+ isopropyl alcohol, and apply a fresh drop of high-performance thermal compound (e.g., Arctic MX-4/MX-6 or Noctua NT-H2).
5. Software Optimization & Operating System Hygiene
A pristine physical machine still feels slow if the operating system is bogged down by background processes, fragmented indexing, unoptimized storage, and startup bloatware.
Streamline Startup Applications
Every application that launches at boot stays resident in RAM and consumes CPU cycles, slowing system boot times and draining battery background life.
Windows 11/10: Press
Ctrl + Shift + Escto open Task Manager → Navigate to the Startup Apps tab → Sort by Startup Impact. Right-click and disable non-essential third-party applications (e.g., Spotify, Teams, Discord, Steam, Adobe Launchers).macOS: Open System Settings → General → Login Items → Remove unnecessary applications from the Open at Login list.
Storage Optimization for SSDs
Modern laptops rely on Solid State Drives (SSDs). Unlike traditional spinning hard drives (HDDs), SSDs require different maintenance principles.
Crucial Rule: NEVER defragment a Solid State Drive (SSD). Defragmentation causes unnecessary read/write cycles that wear out flash memory cells without providing performance gains.
Ensure TRIM is Active: TRIM allows the operating system to inform the SSD which data blocks are no longer in use, allowing internal garbage collection to run efficiently.
In Windows, search for Defragment and Optimize Drives. Verify that your drive is recognized as a Solid State Drive and that schedule optimization is turned On (Weekly).
Maintain Free Space Overhead: SSDs suffer severe write speed degradation and increased wear when filled past 85–90% capacity. Keep at least 15–20% of total SSD capacity free to allow dynamic wear-leveling algorithms room to operate.
                  ┌──────────────────────────────────────────────┐
                  │          Total SSD Storage Capacity          │
                  └──────────────────────┬───────────────────────┘
                                         │
                   ┌─────────────────────┴─────────────────────┐
                   ▼                                           ▼
      ┌───────────────────────────┐               ┌───────────────────────────┐
      │  Active Data (0% - 85%)   │               │   Free Reserve Space      │
      ├───────────────────────────┤               ├───────────────────────────┤
      │ • OS files & Applications │               │ • Required: 15% - 20%     │
      │ • Personal User Files     │               │ • Enables Wear Leveling   │
      │ • Media & Projects        │               │ • Prevents SSD Slowdowns  │
      └───────────────────────────┘               └───────────────────────────┘
Driver and Firmware Hygiene
Outdated device drivers cause device instability, memory leaks, system crashes, and poor power efficiency.
System BIOS/UEFI Updates: Manufacturers like Dell, Lenovo, and HP regularly push BIOS updates that refine thermal fan curves, resolve power management bugs, and fix hardware vulnerabilities. Check your manufacturer support page or update utility (e.g., Dell Command | Update) every quarter.
Graphics Drivers: Keep GPU drivers updated directly through NVIDIA GeForce Experience, AMD Software, or Intel Driver & Support Assistant rather than relying solely on generic Windows Update drivers.
6. Security and Data Protection Strategy
Hardware failure or physical theft can happen despite meticulous care. Protecting your data and securing your OS from malicious software are critical maintenance pillars.
The 3-2-1 Backup Rule
Never rely solely on a laptop’s local SSD. A single power surge, liquid drop, or ransomware attack can destroy irreplaceable data.
                        ┌──────────────────────────────┐
                        │    3-2-1 Backup Strategy     │
                        └──────────────┬───────────────┘
                                       │
        ┌──────────────────────────────┼──────────────────────────────┐
        ▼                              ▼                              ▼
┌───────────────┐              ┌───────────────┐              ┌───────────────┐
3 Copies of Data               2 Media Types                  1 Offsite Copy
(1 Primary, 2 Backups)         (Local Drive + Cloud)          (Remote/Cloud Storage)
└───────────────┘              └───────────────┘              └───────────────┘
3 Copies of Data: Keep your original operational data plus two backup copies.
2 Different Media Types: Store copies across different physical media (e.g., your laptop’s internal SSD and an external USB-C Portable SSD).
1 Offsite Copy: Keep one copy in a separate physical location (e.g., automated cloud storage like OneDrive, Google Drive, Backblaze, or iCloud).
Security Hygiene
Windows Defender & Gatekeeper: Built-in security solutions on modern OS platforms are lightweight and effective. Avoid installing bloatware-heavy third-party antivirus suites that hog memory and CPU cycles unless required by enterprise compliance.
Browser Hygiene: Install lightweight content blockers like uBlock Origin to mitigate malvertising risks, and audit browser extensions quarterly to remove unused or suspicious add-ons.
7. Master Laptop Maintenance Schedule
Use this reference table to establish an organized routine for hardware care, cleaning, and software optimization.
| Frequency | Area | Recommended Task |
| Daily | Physical / Usage | • Work on flat surfaces; avoid soft beds or blankets.
• Open lid gently from the center top.
• Maintain a liquid-free safety zone around the workspace. |
| Weekly | Software / Storage | • Clear temporary cache files using native OS tools.
• Reboot system fully (don’t rely solely on Sleep/Hibernate).
• Verify active Cloud Syncing backup status. |
| Monthly | Physical / Cleaning | • Wipe down display screen with damp microfiber cloth.
• Disinfect keyboard, keycaps, and trackpad with 70% Isopropyl.
• Clear external chassis and connectivity ports of pocket lint/debris. |
| Quarterly | Thermals / Drivers | • Blast air intake/exhaust vents with compressed air (fan blades locked).
• Run manufacturer diagnostic utilities (e.g., Dell SupportAssist).
• Check and apply system BIOS/UEFI and chipset updates. |
| Bi-Annually | OS / Security | • Audit startup apps and remove unused software installations.
• Audit internal SSD storage space (ensure 15-20% free overhead).
• Run hardware diagnostics test to evaluate battery capacity health percentage. |
| Every 2-3 Years | Advanced Hardware | • Perform internal chassis dust cleaning (remove back panel).
• Evaluate thermal performance; replace CPU/GPU thermal paste if throttling.
• Replace original battery if total health capacity drops below 70-75%. |
Summary Checklist for Long-Term Laptop Longevity
[ ] Thermals: Never block air vents; use hard surfaces or stands.
[ ] Physical Care: Open lid from center; store in a padded sleeve when traveling.
[ ] Battery: Cap charge thresholds to 80% if plugged in constantly; avoid charging under high thermal loads.
[ ] Cleaning: Microfiber + 70% Isopropyl alcohol only; compressed air with immobilized fan blades.
[ ] Software: Disable startup bloatware; keep 15-20% SSD space free; maintain a 3-2-1 backup pipeline.
Leave a Reply